Greater Midwest Foodways Alliance
FAMILY HEIRLOOM RECIPES
Contestants entered their best scratch family heirloom recipe suitable for a family or community dinner. Recipe should originate before 1950.
Contestants brought a prepared dish along with a brief story of who passed the recipe down to them, ethnicity, if relevant, number of years the recipe has been in their family and any interesting information about their recipe.
JUDGING CRITERIA
Taste: 50%
History: 40%
Appearance: 10%
Premiums sponsored in partnership with Feedstuffs FoodLink.com

Competition was conducted on August 21st, these are the results:
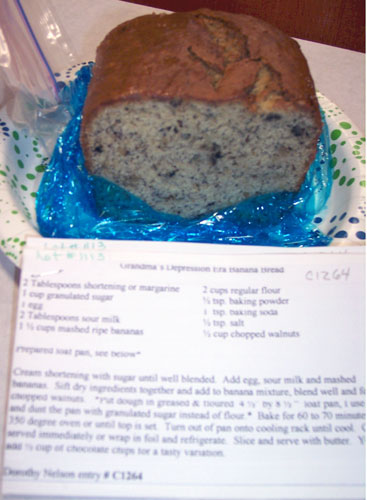
Banana Bread (image by Mary Gunderson)
Grandma’s Depression Era Banana Bread
Dorothy Nelson, Roseville, Minnesota
This recipe was handed down to my Mom (now 95 years old) from her Mother. I remember as a child my brothers and sister and I enjoying this comfort food, my mom was not the greatest cook, but she couldn’t make it wrong. I have made it several times for my family and have passed the recipe down to my niece who is an accomplished baker. I have tried several Banana Bread recipes but have always returned to this one. During the Depression, 1t was difficult to get some baking ingredients, Grandma’s recipe has only two tablespoons of shortening and one egg, but the flavor remains great and the bread stays moist for several days when stored in the refrigerator.
Grandma’s Depression Era Banana Bread
Dorothy Nelson, Roseville, Minnesota
2 Tablespoons shortening or margarine
1 cup granulated sugar
1 egg
2 Tablespoons sour milk
1 1/2 cups mashed ripe bananas
2 cups regular flour
1/2 tsp.baking powder
1 tsp. baking soda
1/2 tsp. salt
1/2 cup chopped walnuts
Prepared loaf pan, see below*
Cream shortening with sugar until well blended. Add egg, sour milk and mashed bananas. Sift dry ingredients together and add to banana mixture, blend well and fold in chopped walnuts . *Put dough in greased &. floured 4 1/2″ by 8 1/2” loaf pan, I use PAM.I and dust the pan with granulated sugar instead of flour* Bake for 60 to 70 minutes in a 350 degree oven or until top is set. Turn out of pan onto cooling rack until cool. Can be served immediately or wrap in foil and refrigerate. Slice and serve with butter. You can add 1/2 cup of chocolate chips tor a tasty variation.
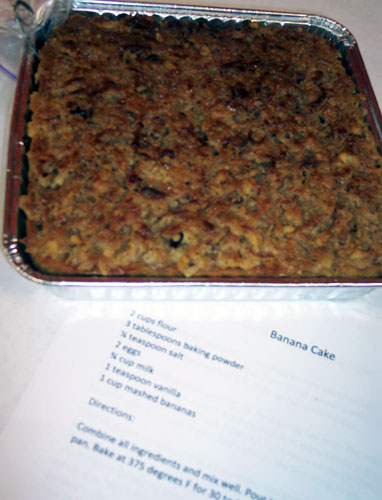
Banana Cake (Image by Mary Gunderson)
Grandma Lois’s Banana Cake
Sheri Thingvold, Rockford, Minnesota
As far back as I can remember grandmas banana cake has been at every family gathering. The recipe was handed down to my grandma who then passed on to my Aunt Sandy the oldest of 8 in 1962 on her wedding day.
Since my grandmothers passing my Aunt Sandy has been the maker of this banana cake and she always makes sure it is at every family gathering. We are always so excited to see each other but even more excited knowing there will be banana cake to be eaten and that’s always the first thing to go.
I felt so grown up when I was 11 years old and grandma brought me into her kitchen and taught me how to make her famous banana cake. That’s what I thought of her cake because it was always so yummy and I always asked for it on my birthday. Grandma showed me her tricks on how to get the frosting just right which was “don’t take your eyes off the cake when it’s under the broiler and be patient”. She was always so sweet and loving and enjoyed showing her grand kids how to bake. I am so grateful to have had those fond memories of my grandma.
I will carryon this family tradition for my generation and look forward to the time when I can pass it to my daughter. I hope you enjoy grandma’s banana cake as we have for many years and many more to come.
Grandma Lois’s Banana Cake
Sheri Thingvold, Rockford, Minnesota
2 cups flour
3 tablespoons baking powder
1/4 teaspoon salt
2 eggs
3/4 cup milk
1 teaspoon vanilla
1 cup mashed bananas
Directions:
Combine all ingredients and mix well. Pour in a greased and flour 9 x 13 cake pan. Bake at 375 degrees F for 30 to 35 minutes.
Frosting
1 stick of butter
1 cup brown sugar
1 1/2 cup coconut
1/2 cup chopped walnuts
1 tablespoon milk
Melt butter in a small saucepan on low heat – remove from heat and in the same pan combine brown sugar, chopped walnuts, coconut and milk. Spread frosting mixture on the cake and put under the oven broiler with door open and let frosting bubble and brown slightly – rotating pan if needed. This should only take only a few minutes and watch carefully. Remove from oven to a wire rack to cool.
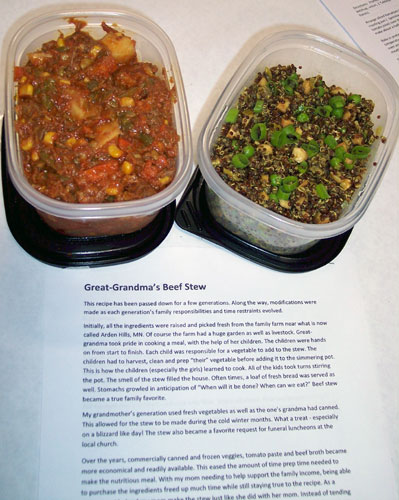
Great Grandma’s Beef Stew (Image by Mary Gunderson)
Great-Grandma’s Beef Stew
Rachel Hannegan, Shoreview, Minnesota
This recipe has been passed down for a few generations. Along the way, modifications were made as each generation’s family responsibilities and time restraints evolved.
Initially, all the ingredients were raised and picked fresh from the family farm near what is now called Arden Hills, MN. Of course the farm had a huge garden as well as livestock. Great-grandma took pride in cooking a meal, with the help of her children. The children were hands on from start to finish. Each child was responsible for a vegetable to add to the stew. The children had to harvest, clean and prep “their” vegetable before adding it to the simmering pot. This is how the children (especially the girls) learned to cook. All of the kids took turns stirring the pot. The smell of the stew filled the house. Often times, a loaf of fresh bread was served as well. Stomachs growled in anticipation of “When will it be done? When can we eat?” Beef stew became a true family favorite.
My grandmother’s generation used fresh vegetables as well as the one’s grandma had canned. This allowed for the stew to be made during the cold winter months. What a treat – especially on a blizzard like day! The stew also became a favorite request for funeral luncheons at the local church.
Over the years, commercially canned and frozen veggies, tomato paste and beef broth became more economical and readily available. This eased the amount of time prep time needed to make the nutritious meal. With my mom needing to help support the family income, being able to purchase the ingredients freed up much time while still staying true to the recipe. As a youngster, I helped my mom make the stew just like she did with her mom. Instead of tending the garden, I emptied the store bought cans and peeled potatoes. This was one way to get my brother and I involved with cooking. We also learned to eat vegetables!
A pot of stew can now be simmering on the stove or in a crock pot in a matter of minutes versus hours. Yet, the good old fashioned taste and stomach growling anticipation is the same. And, of course, it is still made with love and the thought of great-grandma! While I do not have children of my own, I do plan to pass the recipe onto my nephews and their future wives. I have served this stew to my friends many of whom have asked for the recipe. Great-grandma’s stew will live on for more generations to come.
Great-Grandma’s Beef Stew
Rachel Hannegan, Shoreview, Minnesota
2 lbs. beef steak or stew meat
6-8 potatoes (medium baker size) 8-10 carrots
1 cup or 1- 15 oz. can corn
2 cups or 1- 14.5 oz. can green beans 1 cup or 1- 8.5 oz. can peas
1/4 cup minced onion
1 cup or 12 oz. (large) + 6 oz. (small) can tomato paste
1 3/4 cups or 1-14.5 oz. can beef stock/broth
1/4 cup flour
2 tbsp vegetable oil
1 tsp. salt
Cut the beef into 1×1 pieces and coat with flour. Shake off excess flour and brown the beef chunks in a skillet using the vegetable oil. Cut carrots and potatoes into small bite sized chunks. Add all of the ingredients to a large saucepan, kettle or crock pot. Simmer on medium heat for 4-6 hours or whenever the potatoes are cooked through. Leftovers may be frozen for use at a later date.
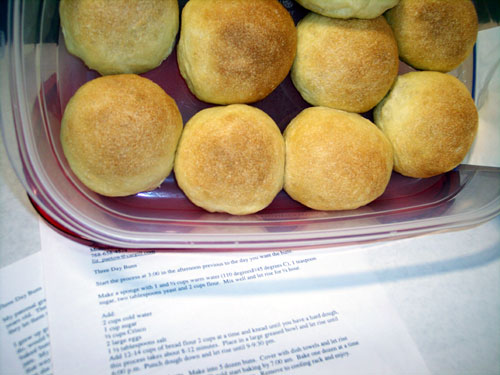
Three Days Buns (Image by Mary Gunderson)
Three Day Buns
Elizabeth Paetow, Montrose Minnesota
My paternal grandmother grew up with these buns. The recipe has to be at least 100 years old. They actually did take three days to make. The yeast was not as strong and they let them rise more times that we do now.
I grew up going to my grandmother’s house and the first thing my brothers and I would do, would be to look for the big blue canner. It was always filled to the brim with fresh baked buns. We would eat the first one plain then graduate to butter and fresh strawberry jam. My uncle taught us to just poke a hole in the bun and fill it with jam and eat them that way. My mother learned how to make them also and they tasted just like grandmas but she usually made big batches of bread instead. I think it was easier for her with working outside the home and 4 children.
I watched my grandmother do a lot of cooking and baking and learned quite a bit from her. When I got married I requested my grandmother make them for my reception. I never did make these buns with her but did get the recipe when I was in my 20’s. I watched her make these buns many times and learned how to form them by watching her. When she did not want to be responsible for making them any longer for family events, it became my responsibility.
I really can brag that the first time I made them they tasted just like hers. Not everyone can shape them properly, it takes practice. The recipe makes a large batch but I have never cut it down. It makes 5 dozen and they don’t last long when you have a big gathering.
They are a family favorite and now my daughter, nephew and niece all want to learn how to make them.
Three Day Buns
Elizabeth Paetow, Montrose Minnesota
Start the process at 3:00 in the afternoon previous to the day you want the buns.
Make a sponge with 1 and 1/2 cups warm water (110 degreesF/45 degrees C), 1 teaspoon sugar, two tablespoons yeast and 2 cups flour. Mix well and let rise for 1/2 hour.
Add:
2 cups cold water 1 cup sugar
1/2 cups Crisco
2 large eggs
1 1/2 tablespoons salt
Add 12-14 cups of bread flour 2 cups at a time and knead until you have a hard dough, this process takes about 8-12 minutes. Place in a large greased bowl and let rise until 6:00 p.m. Punch dough down and let rise until 9-9:30 pm.
Grease 5 cookie sheets. Make into 5 dozen buns. Cover with dish towels and let rise overnight. Heat oven to 350. Should start baking by 7:00 am. Bake one dozen at a time for 10-12 minutes or until nicely golden brown. Remove to cooling rack and enjoy.
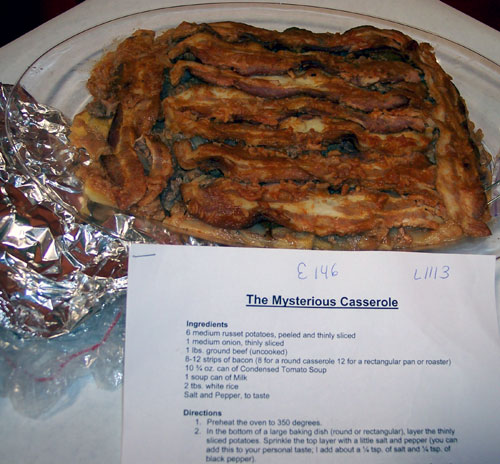
Mysterious Casserole (Image by Mary Gunderson)
Mysterious Casserole
Leigh Walter, Prior Lake, Minnesota
A casserole recipe … .from the Midwest? Hardly a monumental feat I know. The fact that I have an heirloom recipe at all, and a casserole at that; is why this dish is known as well, actually it isn’t known as anything! It is the most mysterious dish that was ever, or never, prepared; dependant on whom you ask.
As the descendant of German farmers, my parents, and subsequently myself, grew up eating meat (in its original form), the corresponding vegetable for that meat and, of course, white potatoes. I bet you didn’t know that pork roast can only be served with peas but I digress. A casserole was unheard of. meat, potatoes and vegetables; all cooked together? Why would you want to do that? That said, one day, in what I’m certain was a clandestine cooking adventure, this casserole came to be.
This casserole began its Walter family journey three generations ago. It was apparently never prepared, but mysteriously appeared on the table, in a large roasting pan, after church on Sundays when my Father was a child. This same dish was then mysteriously passed on to the second generation who would make it in a much smaller roasting pan (less kids, no farm work to build up the appetite). When passed on to the third generation, it still had no name, no measurements, no pan size, no baking instruction, and, of course, was verbally relayed as to continue its mysterious heritage …. or provide plausible deniability that one had ever prepared it. …. In either case, here’s what I know:
“You just take some potatoes and onions and layer them with the raw ground beef and bacon. Sprinkle some rice on top, pour a can of tomato soup with some milk … or maybe it was water …. over the top and bake it”. If you’re like me, and had any questions as to how to make it at this point, the next sentence would be, ‘Well you just start out like you would for scalloped potatoes and ham”.
Surprisingly enough, I was able to prepare the dish and it tasted exactly as I remembered it. In case you need a little more guidance, I’ve provided a recipe today that serves six however; you can easily double or triple the recipe when cooking for a large crowd. Oh, and in case you are wondering; it can only be served in this family with green beans!
Mysterious Casserole
Leigh Walter, Prior Lake, Minnesota
Ingredients
6 medium russet potatoes, peeled and thinly sliced
1 medium onion, thinly sliced
1 Ibs. ground beef (uncooked)
8-12 strips of bacon (8 for a round casserole 12 for a rectangular pan or roaster)
10 3/4 oz. can of Condensed Tomato Soup
1 soup can of Milk
2 tbs. white rice
Salt and Pepper, to taste
Directions
1. Preheat the oven to 350 degrees.
2. In the bottom of a large baking dish (round or rectangular), layer the thinly sliced potatoes. Sprinkle the top layer with a little salt and pepper (you can add this to your personal taste; I add about a 1/4 tsp. of salt and 1/4 tsp. of black pepper).
3. Add half of the thinly sliced onions; then break up the ground beef evenly across the baking dish. Top with the other half of the thinly sliced onions.
4. Lay the bacon evenly across the top. Sprinkle the white rice over the bacon.
5. Mix the tomato soup with the milk and pour over the top.
6. Cover with the lid, or tin foil, and bake for 70 minutes. Uncover and bake for an additional 20 minutes.
Note: The recipe as presented today serves (6) however; you can easily double or triple the recipe for a large crowd. When doing so, it is best to make in a large roaster. If it’s shallow and long, you will not need to adjust the baking time. If it is deeper and round, you will need to add 15-20 minutes to both the covered and uncovered baking time.